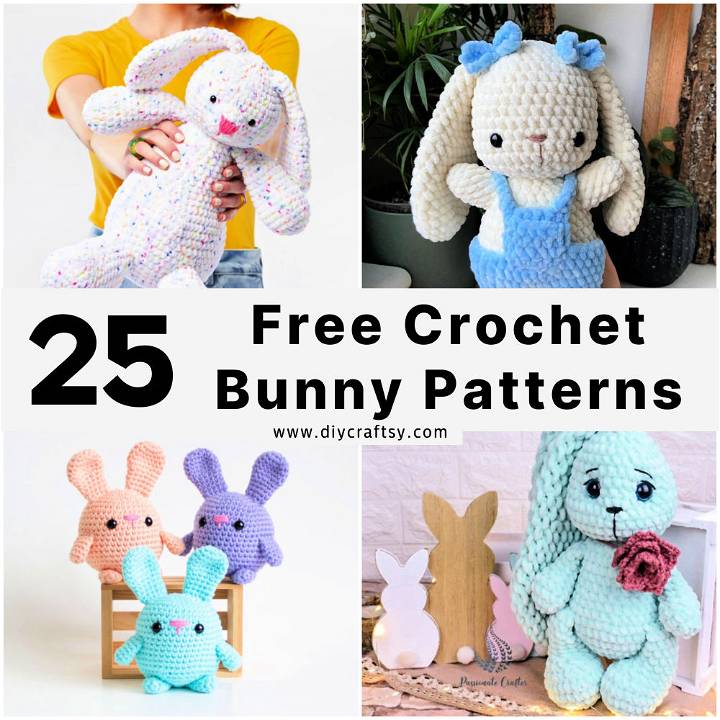
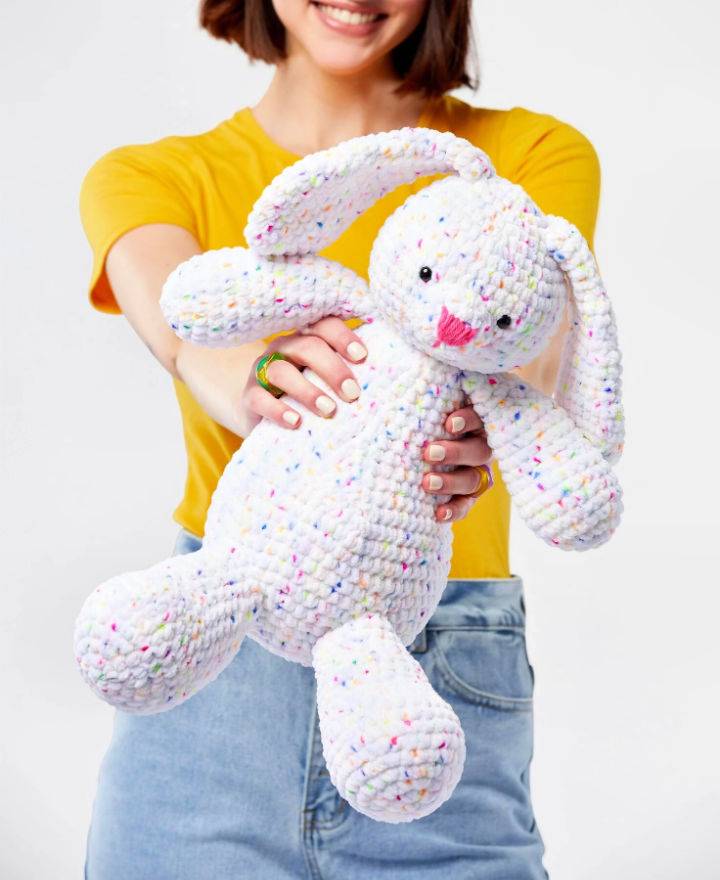
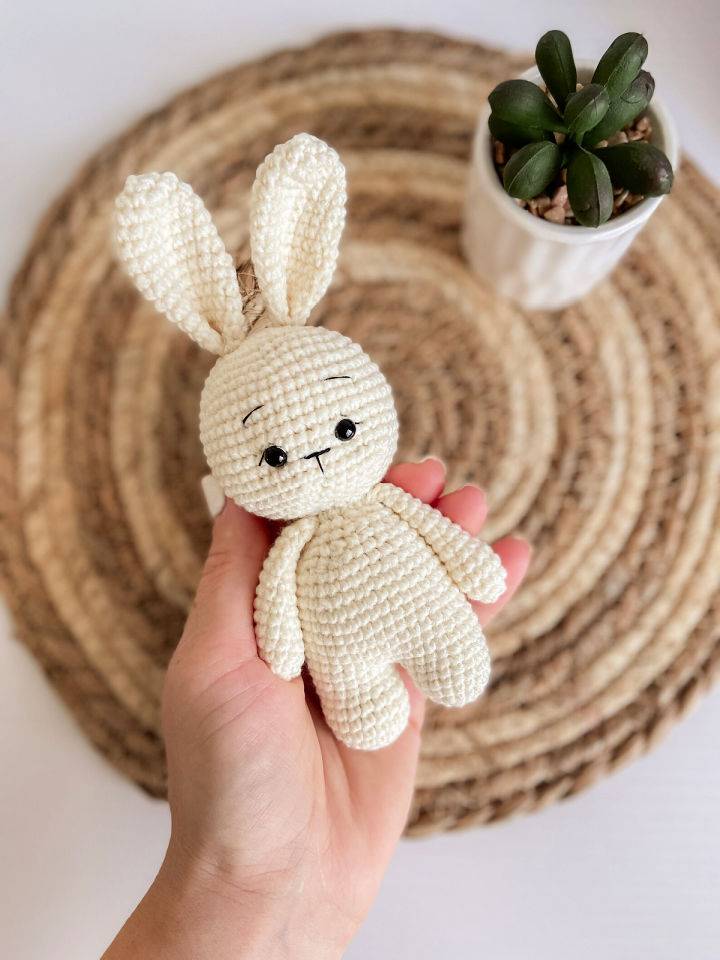
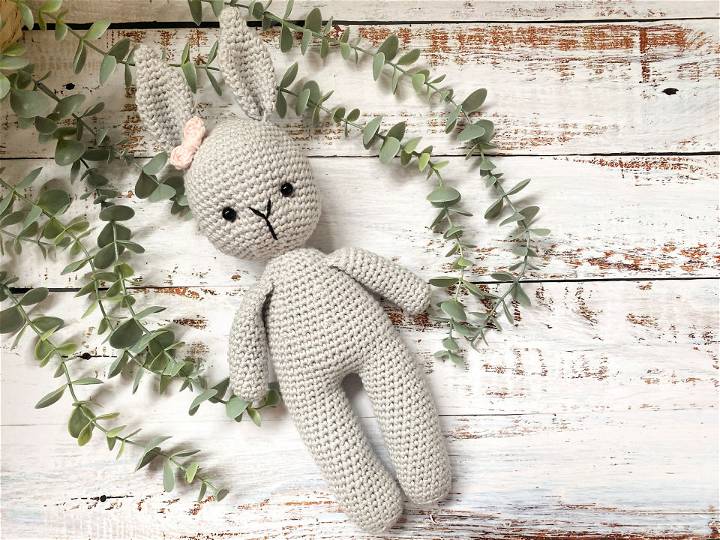
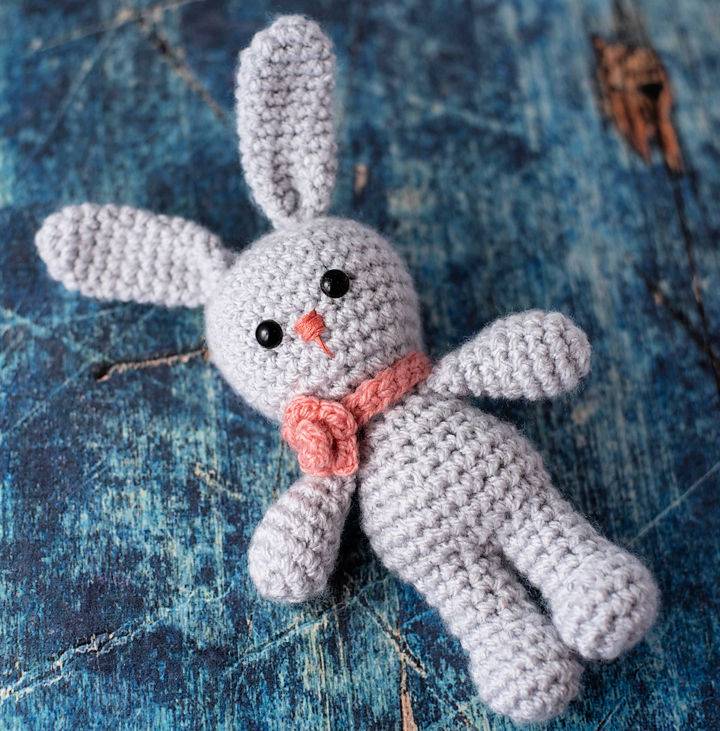
Crochet bunnies hopping across the nursery room shelf add a touch of whimsy to the decor. Learn how to crochet a bunny with a plethora of 25 free crochet bunny patterns available below. Each crochet bunny pattern includes step by step instructions, easy techniques, and tips so you can easily make a soft, cuddly amigurumi that’s sure to bring a smile to anyone’s face. These free bunny crochet patterns range from simple to intricate amigurumi rabbits, perfect for crafters who enjoy working with their hands and bringing yarn creations to life.
If you’re ready to hop into crocheting, the following collection of crochet bunny patterns is an ideal starting point. Not only are they brimming with cuteness, but they’re also accessible and thoroughly explained, ensuring a rewarding crafting experience. Each crochet bunny pattern offers a unique take on these lovable creatures, so grab your hook, select your yarn, and let’s get stitching!
These free crochet bunny patterns are not just projects but gateways to making lasting memories, whether for kids, as decorative pieces, as gifts, or just because. So let’s unravel the crochet bunny patterns and get ready to meet your next handmade friend.
Beginner’s Guide to Crocheting Your First Bunny
As a crochet beginner, it might seem daunting to start with an amigurumi project like a bunny, but with a step-by-step guide, you’ll find that it’s an achievable and enjoyable craft. Here’s a detailed guide to get you started.
Gathering Your Supplies
Before you dive into crocheting, you’ll need to gather the following supplies:
- Yarn: Choose a color you love in a DK or worsted-weight yarn for easy handling.
- Crochet Hook: Start with a size that’s comfortable for your hands—usually a size smaller than recommended for your yarn to create tight stitches that will hold stuffing well.
- Tapestry Needle: For sewing parts together and weaving in ends.
- Stitch Markers: These will help you keep your place as you work in the round.
- Toy Stuffing: This will give your bunny its shape and cuddliness.
- Scissors: You’ll need a pair for cutting yarn.
- Safety Eyes: Pick the size appropriate for your bunny, or use yarn to embroider the eyes for a child-friendly option.
Understanding the Basics
Before you start your bunny, make sure you understand these basic crochet terms and techniques:
- Magic Circle: This technique starts your work in the round without leaving a hole.
- Chain (ch): The foundation of all crochet projects.
- Single Crochet (sc): The basic stitch used in amigurumi.
- Increase (inc): Making two stitches into one to expand your work.
- Decrease (dec): Combining two stitches into one to taper your work.
Step-by-Step Crochet Bunny
1. Start with the Head:
- Use the magic circle technique to start crocheting in the round.
- Work a few rounds of single crochet stitches, increasing as needed to form a sphere.
2. Shape the Body:
- Continue working in single crochet, following your pattern to increase and decrease to shape the bunny’s body.
3. Make the Ears:
- Crochet two ears, starting with a chain and working in rows.
- Shape them with decreases, and then sew them to the head.
4. Crochet the Arms and Legs:
- Work in rounds, starting with a magic circle.
- Use stuffing sparingly to keep them flexible.
5. Assemble Your Bunny:
- Sew the arms, legs, and ears to the body using a tapestry needle.
- Place the safety eyes (or embroider them), and stitch on a nose and mouth.
6. Finishing Touches:
- Weave in all loose ends with your tapestry needle.
- Add any additional accessories or features you desire.
Once you’ve finished your bunny, step back and appreciate your work. You’ve learned new skills and created something adorable!
Crochet Bunny Pattern: Tips for Perfecting Your Project
Creating a crochet bunny can be a fun and rewarding project, whether you’re a seasoned crocheter or just starting out. These fluffy companions make excellent gifts and adorable decorations. To ensure your bunny comes out as cuddly and cute as possible, here are some additional tips and tricks.
Choosing the Right Yarn
- Softness: For a bunny that’s nice to cuddle, opt for yarn that’s soft to the touch. Baby yarns are often a great choice.
- Washability: If the bunny is for a child, make sure the yarn is machine washable for easy cleaning.
- Color: Think about whether you want a realistic bunny color or something more whimsical and fun.
Choosing the Right Hook
When diving into the world of crocheting bunnies, selecting the correct hook size can make all the difference. It ensures that your stitches are tight enough to prevent the stuffing from showing and gives your bunny the desired shape and firmness.
Hook Material:
- Aluminum Hooks: Lightweight and smooth, great for beginners.
- Bamboo Hooks: Offers a comfortable grip and warm feel, ideal for those with hand fatigue.
- Plastic Hooks: Affordable and available in larger sizes, suitable for bulky yarns.
Hook Size:
For most amigurumi projects, including crochet bunnies, smaller hooks than those recommended for the yarn are used. This results in tighter stitches.
- DK Yarn: A 3.5mm (E) to 4mm (G) hook is commonly used.
- Worsted Yarn: Try a 3.75mm (F) to 4.5mm (G) hook for a tighter fabric.
- Bulky Yarn: Consider a 5mm (H) to 6mm (J) hook, depending on the tightness required.
Perfecting the Stitches
- Consistent Tension: Keeping your stitches consistent is key. This ensures that the bunny’s fabric is even and there are no holes for the stuffing to peek through.
- Counting Stitches: Keep a count of your stitches to maintain the correct shape. Miscounting can lead to an asymmetrical bunny.
- Invisible Decreases: When shaping your bunny, use invisible decreases to make the decreases less noticeable.
Shaping Your Bunny
- Head and Body: Start with the head and body, as they form the main structure of your bunny. Make sure they’re well-stuffed and shaped before moving on to the limbs and ears.
- Limbs: Crochet the arms and legs with enough stuffing to be firm but not overstuffed. They should be proportional to the body.
- Ears: Bunny ears can be long and floppy or short and perky. Choose a style that fits the personality of the bunny you’re creating.
Adding Character
- Facial Features: The face is where you give your bunny its personality. Small changes in the placement of eyes or the shape of the nose can make a big difference.
- Accessories: Consider adding a bow, a little vest, or a carrot for your bunny to hold. These small details can add a lot of charm.
Finishing Touches
- Sewing Parts Together: Use a yarn needle and the same yarn to sew the parts together. Make sure the stitches are secure and invisible.
- Trimming Yarn Ends: Trim any loose yarn ends close to the bunny’s body to give a neat finish.
- Adding Blush: A small amount of pink blush on the cheeks can bring your bunny to life.
Tips for Success
- Keep It Tight: Make sure your stitches are tight enough to prevent the stuffing from showing.
- Take Your Time: Rushing can lead to mistakes. Enjoy the process and take breaks when needed.
- Practice Makes Perfect: Don’t be discouraged if your first bunny isn’t perfect. Each project will help you improve.
Remember, every bunny you crochet will have its own unique character. Don’t worry if your project isn’t perfect—those little imperfections add to its handmade charm. Enjoy the process and watch as your crochet bunny takes shape under your fingers.
Essential Crochet Stitches and Techniques for Bunny Patterns
Crocheting bunny patterns can be an enjoyable and rewarding hobby. To ensure your finished bunny comes out as adorable as the ones in the pattern photos, it’s important to be familiar with some key crochet stitches and techniques. Here’s a guide to help you get started:
Starting with the Basics:
- Magic Circle: This technique is used to start amigurumi projects. It creates a tight center, with no hole, which is ideal for the beginning of crochet bunny heads and bodies.
- Single Crochet (sc): The most common stitch in amigurumi. It’s a simple stitch that creates a dense fabric, which is perfect for holding in the stuffing.
- Single Crochet Increase (inc): This means making two single crochets in one stitch. It’s used to widen your work, which is necessary for shaping your bunny.
- Single Crochet Decrease (dec): Combining two stitches into one to reduce the width, this technique helps shape the bunny, especially around the head and limbs.
Advanced Techniques for Shaping:
- Working in the Back Loop Only (BLO): By inserting your hook into only the back loop of the stitch, you create a ridge in your fabric. This can be used to define the feet or give texture to your bunny.
- Changing Colors in Crochet: For bunnies with different colored patches or clothes, you’ll need to know how to change yarn colors neatly.
Finishing Touches:
- Weaving in Ends: Once you’ve finished crocheting, you’ll have yarn tails. These need to be woven back into the work to hide them and prevent unraveling.
- Safety Eyes vs. Embroidered Eyes: Safety eyes give a professional finish but aren’t suitable for children under three. Alternatively, eyes can be embroidered with yarn for a child-friendly option.
Tips for a Perfect Crochet Bunny:
- Use stitch markers to mark the beginning of a round, making it easier to keep track.
- Stuff as you go, making sure to fill the shapes evenly for a well-defined bunny.
- Choose a hook size smaller than recommended for your yarn to ensure tight stitches that keep the stuffing inside.
- For a child-safe bunny, opt for embroidered eyes and avoid any small, detachable parts.
Caring for Your Crochet Bunny
To keep your bunny looking its best, proper care is essential.
- Washing: Hand-wash with gentle soap and cool water, or machine-wash on a delicate cycle if the yarn allows.
- Drying: Lay flat to dry to maintain shape, avoiding direct heat sources.
By mastering these stitches and techniques, you’ll be well on your way to creating your own collection of crochet bunnies. Remember to be patient with yourself as you learn, and don’t hesitate to unravel and redo sections as needed.
Crochet FAQs for Bunny Patterns
Discover frequently asked questions about crochet bunny patterns. Get all the answers you need to make adorable crochet bunnies.
What types of crochet stitches do I need to know for making bunnies?
- Basic Stitches: Most bunny patterns will require you to know basic stitches such as the chain (ch), single crochet (sc), and double crochet (dc).
- Increases and Decreases: You should also be comfortable with making single crochet increase (sc inc) and single crochet decrease (sc dec) for shaping.
- Magic Circle: For amigurumi bunnies, starting with a magic circle is a common technique to create a tight center with no hole.
Can I use any yarn type for crochet bunnies?
- While you can use any yarn weight from DK to jumbo, it’s best to follow the pattern’s suggested yarn for optimal results.
- For clearer stitch definition, especially for beginners, cotton or cotton blend yarns are recommended. Fluffy yarns can be more challenging as they obscure the stitches.
How do I choose the right crochet hook size?
Typically, you’ll want to use a hook that is one or two sizes smaller than suggested on the yarn label for amigurumi projects. This ensures a tight fabric so the stuffing doesn’t show through.
What should I use for stuffing my crochet bunny?
Toy stuffing or fiberfill is commonly used for stuffing crochet bunnies. Make sure to stuff firmly to give a good shape, but avoid overstuffing which can cause the stitches to stretch.
Are safety eyes safe to use for children’s toys?
While safety eyes are convenient, they can pose a choking hazard for children under 3 years old. Embroidered eyes are a safer alternative for toys intended for young children.
How can I make my crochet bunny unique?
- Customize Colors: Choose yarn colors that match a theme or the recipient’s favorites.
- Accessories: Add embellishments like bows, buttons, or clothing to give your bunny character.
- Size Variation: Use different yarn weights and hook sizes to make bunnies of various sizes.
What if I’m having trouble understanding the pattern?
- Take It Slow: Don’t rush. Read through the pattern a few times before starting.
- Tutorials: Look for video tutorials online that can help clarify difficult steps.
Free Crochet Bunny Patterns:
Discover a collection of 25 free crochet bunny patterns that are perfect for everyone. Get creative and start crafting these adorable crochet bunnies today!
1. How to Crochet Snuggle Bunny – Free Pattern
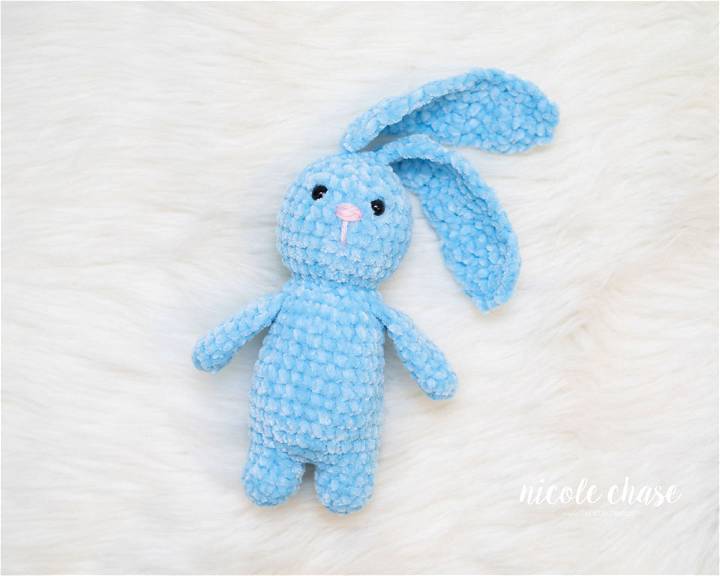
Embark on a delightful crafting journey with Nicole Chase‘s free crochet pattern and create your very own Snuggle Bunny just in time for Easter. This easy-to-follow tutorial is perfect for advanced beginners looking to hone their amigurumi skills. You’ll be guided through each step of the process, resulting in an adorable, no-sew bunny that stands at a charming 7.5 inches tall.
Crafted from soft, super bulky yarn, and requiring minimal materials, this project is not only budget-friendly but also a joy to make. Plus, the pattern cleverly integrates the tail, arms, and ears into the body, eliminating the need for post-crochet assembly. Whether you’re whipping up a thoughtful gift for a little one or adding a homemade touch to your Easter decor, this Snuggle Bunny pattern promises a fulfilling and enjoyable crochet experience.
2. Free Crochet Pom Pom Bunny Amigurumi Pattern
Create a cuddly friend with the Pom Pom Bunny crochet project from Premier Yarns, perfect for crafters looking to add a touch of whimsy to their collection. This engaging crochet pattern results in a 14-inch bunny, made from the soft and playful Premier Parfait® Chunky Pom Pom yarn. You’ll need six balls of the Let’s Glow colorway to bring your bunny to life, along with a US Size I-9 (5.5 mm) crochet hook, tapestry needle, stitch markers, safety eyes, and a small amount of pink yarn for the nose.
Prior crochet experience is beneficial as you’ll be using essential techniques like chain stitches, single crochet, and seaming. The pattern includes detailed instructions to guide you through each step, ensuring your handmade bunny turns out perfectly. Ideal for a heartfelt gift or a charming addition to your décor, this project combines fun and skill-building. Download the free pattern now and start your Pom Pom Bunny adventure with Premier Yarns.
3. Crochet Toy Bunny – Free PDF Pattern
Discover the joy of crafting your very own cuddly companion with the Toy Bunny pattern by Christina Yarema, available on Ravelry. This crochet pattern offers a charming project for crafters who are keen to create a soft, adorable animal toy. Suitable for those familiar with US crochet terminology, the pattern is meticulously detailed across 7 pages, complete with helpful images to guide you through each step.
The finished bunny stands at 17cm tall when made with medium cotton yarn and a 1.75mm hook, making it a delightful gift for loved ones or a whimsical addition to your collection. With an average difficulty rating that caters to intermediate crocheters, this pattern promises a satisfying and creative crafting experience. Embrace the satisfaction of hand-making a unique toy bunny with this Ravelry pattern that is not just a project but a gateway to creating lasting memories.
4. Crochet Bunny Amigurumi Pattern for Beginners
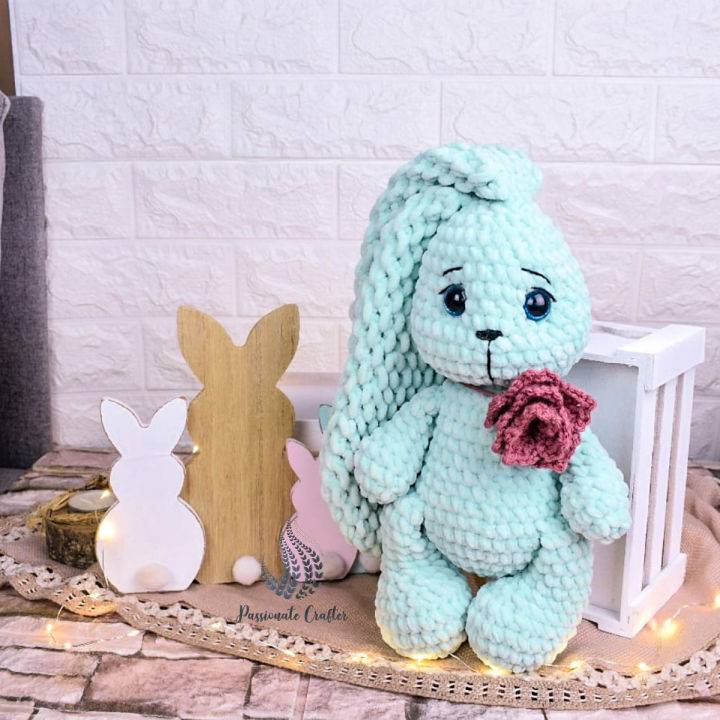
Embark on a delightful crochet journey and create a charming no-sew bunny amigurumi with this beginner-friendly guide. Perfect for crafters who prefer seamless projects, this pattern offers a step-by-step approach to making an adorable plush bunny without the need for sewing separate parts together. You’ll learn essential stitches, techniques for a smooth finish, and tips for choosing the right yarn and hook. Embellish your bunny with personal touches for a special handmade gift.
Follow along for an enjoyable and satisfying crochet experience that brings your own cuddly bunny to life, complete with all the guidance you need for success. This guide is designed to be instructive, helpful, and engaging, ensuring that your crafting adventure is as easy to understand as it is fun. Start crafting your no-sew bunny amigurumi today and enjoy the magic of bringing your creation to life! Passionate Crafter
5. Simple Crochet Meet the Beach Bunny Pattern
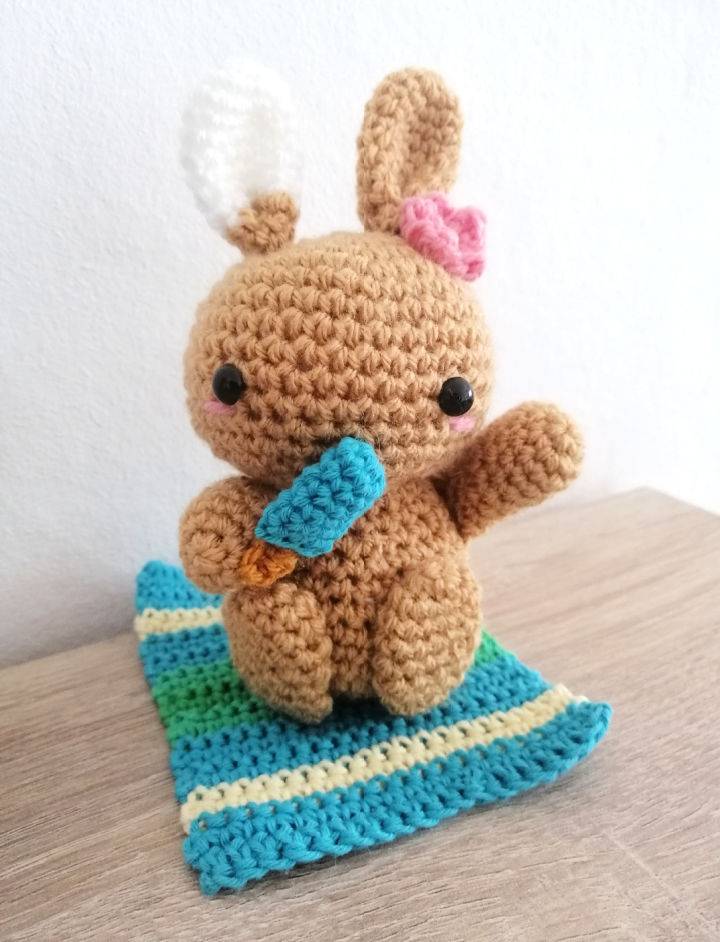
Dive into the delightful world of amigurumi with the August beach bunny crochet pattern by xrinachan. This charming project is perfect for crafters of all levels and is designed to bring a touch of summer fun to your collection. The pattern includes detailed instructions for creating a cute bunny complete with accessories like a popsicle and a colorful towel.
You’ll find helpful information on the materials needed, stitches and abbreviations used, and step-by-step guidance on assembly. Whether you’re looking to create a sunny companion for yourself or a thoughtful handmade gift, this pattern is sure to bring joy. Follow the instructions carefully and get ready to craft a little beach bunny that’s bound to be a crowd-pleaser. Don’t forget to credit xrinachan as the creator when sharing your finished amigurumi! Explore more creative ideas and support the artist on Rina Mogryna Art.
6. Free Crochet Pattern for Floppy Ear Bunny
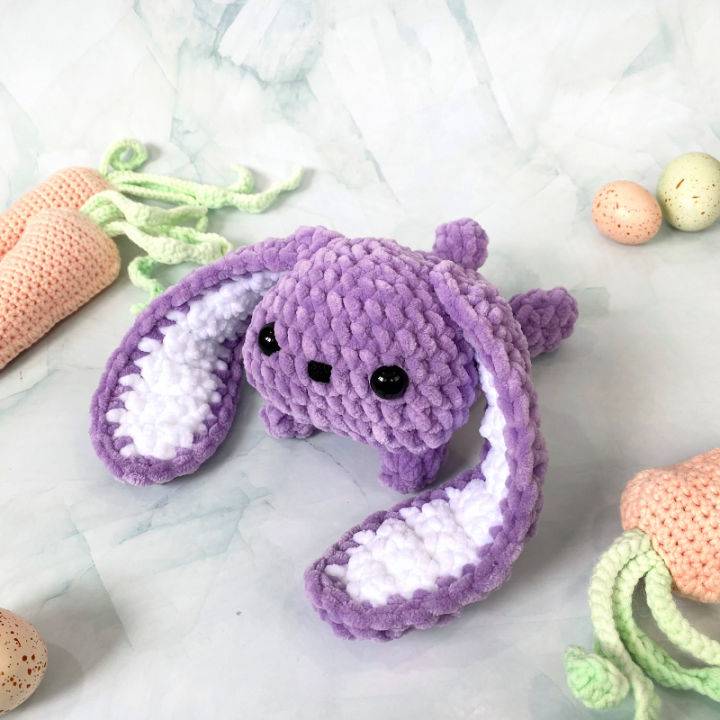
Discover the joy of creating a cuddly companion with the Floppy Ear Bunny Free Crochet Pattern from Spin a Yarn Crochet. Ideal for Spring or as a gift for someone special, this pattern guides you through crafting a super-soft bunny with adorably floppy ears, using Super Bulky yarn for a quick and satisfying project.
With clear instructions on constructing each part of the bunny and assembly tips, this pattern is perfect for crochet enthusiasts looking to add a handmade touch to their collection. Embrace the charm of amigurumi and bring this delightful bunny to life, perfect for both beginners and experienced crocheters. Hop into crafting with this engaging and instructive guide from Spin a Yarn Crochet.
7. Adorable Crochet Hoppy the Bunny Idea
Unleash your creativity with Aquariwool Crochet’s charming “Hoppy The Bunny” free crochet pattern. Perfect for crafters of all levels, this PDF guide helps you create an adorable 13 cm bunny, ideal for gifting or keeping as a cute companion. The pattern requires sport or DK lightweight yarn and a 2.5mm hook to achieve the perfect texture and size. Follow the instructive, easy-to-understand steps and join Aquariwool’s community to share your masterpiece. Start your delightful crochet adventure today with Aquariwool Crochet.
8. Easiest Betty Bunny to Crochet
Unleash your creativity and add a touch of handmade charm to your collection with the delightful Betty Bunny Free Crochet Pattern, presented by Abigurumii. Ideal for crochet enthusiasts of all levels, this easy-to-follow pattern offers a rewarding DIY project, resulting in an adorable bunny that’s perfect for gifting or as a cozy companion.
With comprehensive instructions, including materials, abbreviations, and step-by-step guidance, you’ll have all you need to craft your very own cotton yarn bunny. Whether you’re a seasoned crocheter or a beginner, this pattern is designed to be instructive, helpful, and engaging, ensuring an enjoyable crafting experience. Start your next crochet adventure today with Abigurumii.
9. Pretty Crochet Spring Bunny Amigurumi Pattern
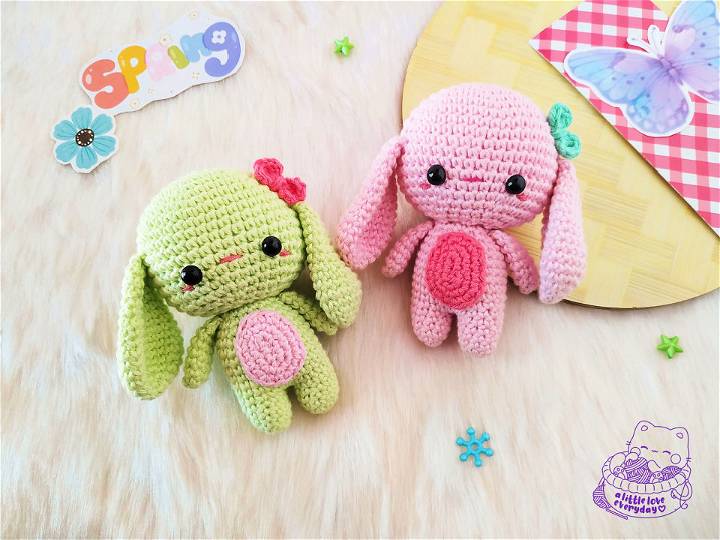
Embark on a delightful crafting adventure with this Spring Bunny amigurumi pattern, perfect for bringing a touch of whimsy to the Easter season. This easy-to-follow guide will help you create an adorable bunny that is sure to become a cherished addition to any Easter basket. Ideal for both novice and experienced crafters, the pattern provides step-by-step instructions using sport weight yarn and a 2mm crochet hook.
As you work up the charming details, from the sweet little ears to the plump body, you’ll learn how to construct an amigurumi toy that’s as enjoyable to make as it is to give. With clear directions for each part, including the head, arms, legs, and cute accessories like a bow, this project promises hours of creative enjoyment. Not only is this a fun springtime project, but it’s also a fantastic way to practice and refine your crochet skills. Hop into the joy of amigurumi and make your own Spring Bunny today—a delightful project from A Little Love Everyday.
10. Easiest Friendly Bunny Rabbit to Crochet

Discover the joy of crafting your very own cuddly crochet bunny rabbit with this delightful free pattern, perfect for Easter or any time you want to create a special handmade gift. Featuring the irresistibly soft Bernat Baby Velvet yarn, this pattern guides you through each step to create a bunny with adorable floppy ears and simple, charming details.
Ideal for both beginners and seasoned crocheters, this pattern provides clear instructions, along with abbreviations and materials needed to bring your bunny to life. Embrace the therapeutic art of crochet and impress your loved ones with a heartwarming, personalized creation. Get ready to hop into a world of creative fun and visit The Friendly Red Fox for this free crochet bunny rabbit pattern.
11. Crochet Spring Sherbet Bunny Amigurumi Tutorial
Discover the joys of springtime crafting with the Spring Sherbet Bunny Amigurumi Crochet Pattern from Crafty Kitty Crochet. Perfect for gift for bunny enthusiasts, this pattern guides you through creating a large, cuddly plush bunny using super bulky yarn for a quick and satisfying project.
The instructions are clear and easy to follow, making it suitable for crocheters looking to add a touch of kawaii charm to their amigurumi collection. Embark on this creative journey and craft a colorful, soft bunny that is sure to bring smiles and a sense of accomplishment. Get your crochet hooks ready and hop into spring with this enchanting pattern from Crafty Kitty Crochet.
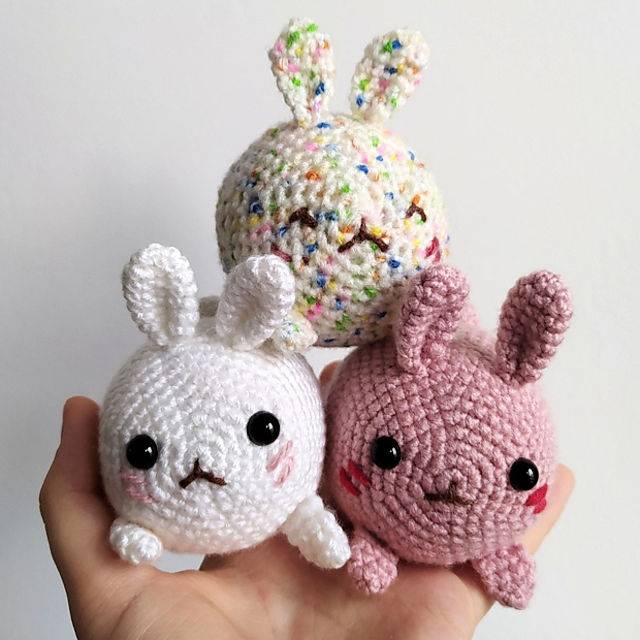
12. Unique Free Crochet Mini Bunny Pattern
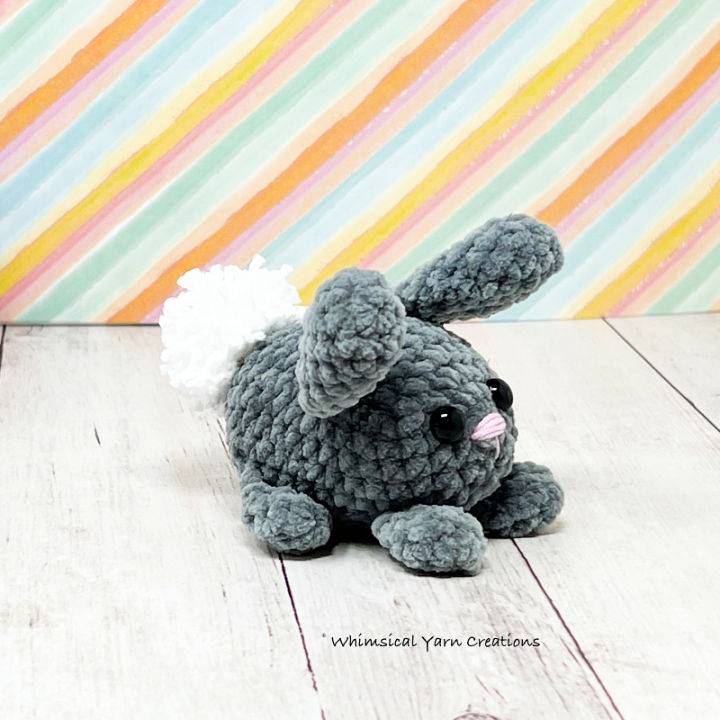
Discover the joy of crafting your very own mini bunny with the free pattern provided by Whimsical Yarn Creations. This adorable amigurumi bunny, perfect for little hands and ideal as a travel companion, is designed to be a delightful project for crocheters of all levels. With comprehensive instructions, you’ll learn to create a bunny that stands 3 inches tall using simple materials like chenille yarn, safety eyes, and stuffing.
This no-sew pattern ensures a smooth crafting experience, only requiring you to sew on the cute pom-pom tail at the end. Whether you’re making a heartfelt gift or adding to your amigurumi collection, this pattern guarantees a whimsical creation you’ll cherish. Remember, this pattern is for personal use and comes with clear copyright guidelines to respect the creator’s work.
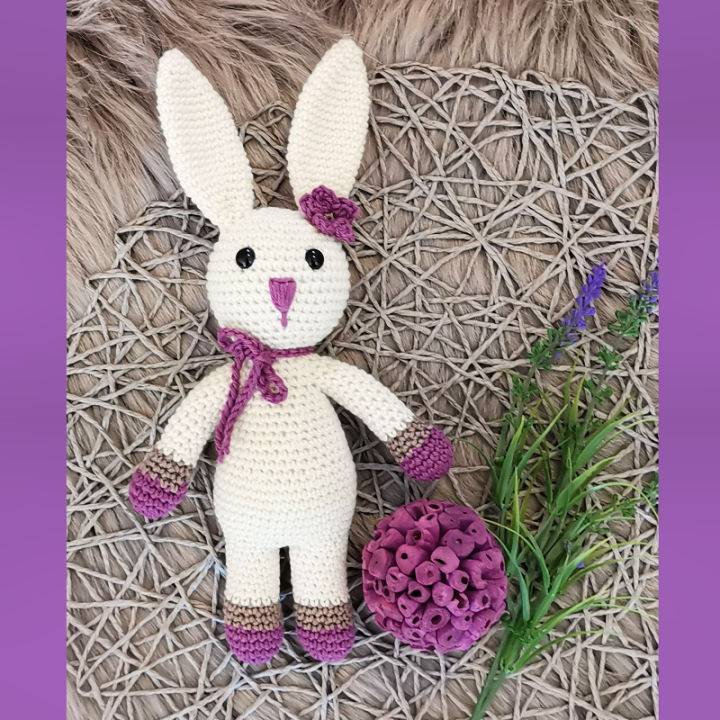
13. Crocheting a Bunny Boss – Free Pattern
Embark on a delightful crafting journey with the Bunny Boss pattern, designed by the talented Celene Montoya, now available for free on Ravelry. Perfect for crochet enthusiasts, this pattern brings to life an endearing and cuddly little bunny that stands just 19cm tall, ears included, when crafted with the recommended materials. With its chubby and soft appearance, the Bunny Boss amigurumi is created using single crochet stitches and assembled with a yarn needle.
You’ll need a 2.5mm crochet hook, suitable yarn (Silvia Wawita in Griss, Cream, and Pink shades is recommended), 9mm safety eyes, stuffing material like cotton or silicon polyester, a yarn needle for joining the parts, stitch markers, and scissors. The pattern is designed with clear instructions to guide both novice and seasoned crocheters in creating a charming stuffed bunny, perfect as a heartfelt gift or a sweet addition to any collection.
14. Quick and Easy Crochet Chubby Bunny Amigurumi Pattern
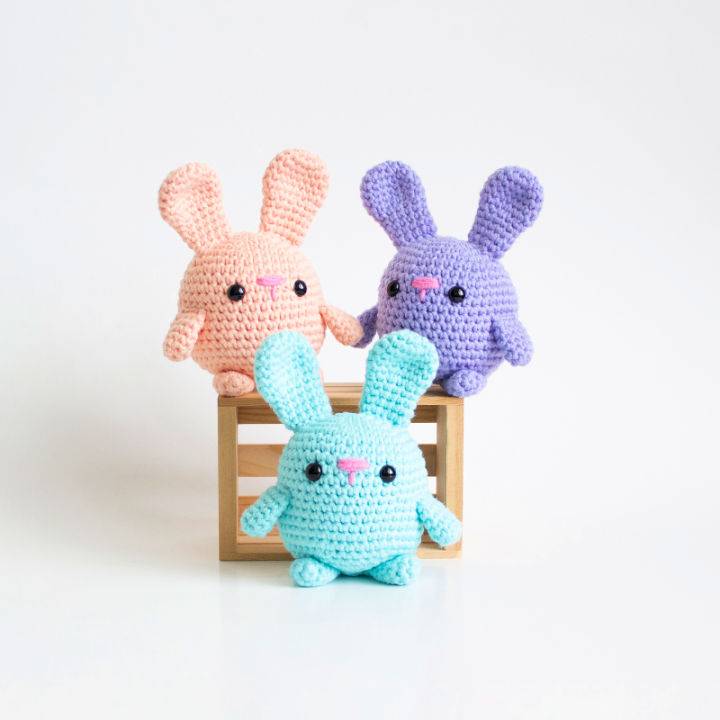
Embrace the joy of spring with this delightful Free Crochet Chubby Bunny Pattern, perfect for both beginners and experienced crocheters! The pattern provides a step-by-step guide to creating an adorable amigurumi bunny, complete with safety eyes and a fluffy tail. Ideal for Easter gifts or as a charming addition to your spring decor, this pattern allows for customization in a rainbow of colors.
Crafted with love, your finished chubby bunny will be a squeezable companion for all ages. Gather your materials, from worsted weight yarn to a 3.5mm hook, and get ready to crochet a cuddly friend. Follow the instructive and helpful guidelines, and soon you’ll have a handmade chubby bunny to call your own. Visit A Menagerie of Stitches for the full free pattern and add a touch of handmade whimsy to your springtime celebrations!
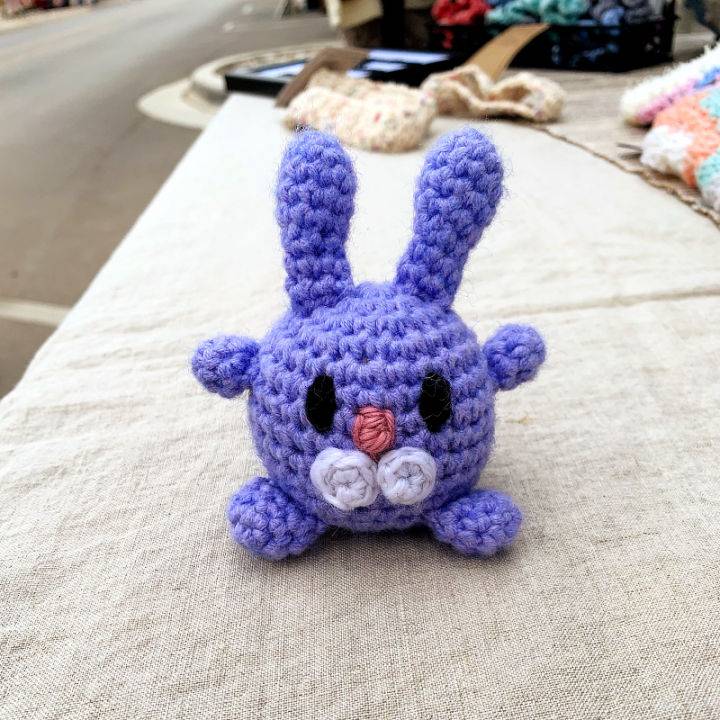
15. Best Bobby Bunny Crochet Pattern
Discover the joy of creating your own adorable Bobby Bunny amigurumi with this easy-to-follow crochet pattern! Perfect for beginners and seasoned crafters alike, the pattern includes detailed instructions and a list of materials you’ll need to bring this cute bunny to life. With a finished size of roughly 6 cm x 8 cm, your Bobby Bunny can be customized with different yarns to create a unique and charming companion. Get started on this rewarding project today and enjoy the process of crocheting with love. Visit Rusty Crochet to find the full pattern and more creative ideas!
16. New Crochet Amigurumi Pattern
Embark on a delightful crafting adventure with the Crochet Bunny Kylie Free Amigurumi Pattern. This charming pattern is perfect for crochet enthusiasts eager to create a cuddly companion for their loved ones. The step-by-step guide is thoughtfully crafted to ensure an enjoyable experience for both beginners and seasoned crocheters. With clear instructions and a list of materials, you can easily bring this adorable amigurumi bunny to life.
Embrace the joy of amigurumi crochet and surprise your kids with a handmade bunny that’s sure to become a treasured keepsake. Dive into this creative endeavor and watch as your crochet skills bring joy to those around you. Remember to keep your stitches tight to ensure a neat finish, and have fun choosing the colors to personalize your bunny! Visit Amigurumi for more heartwarming patterns and inspiration.
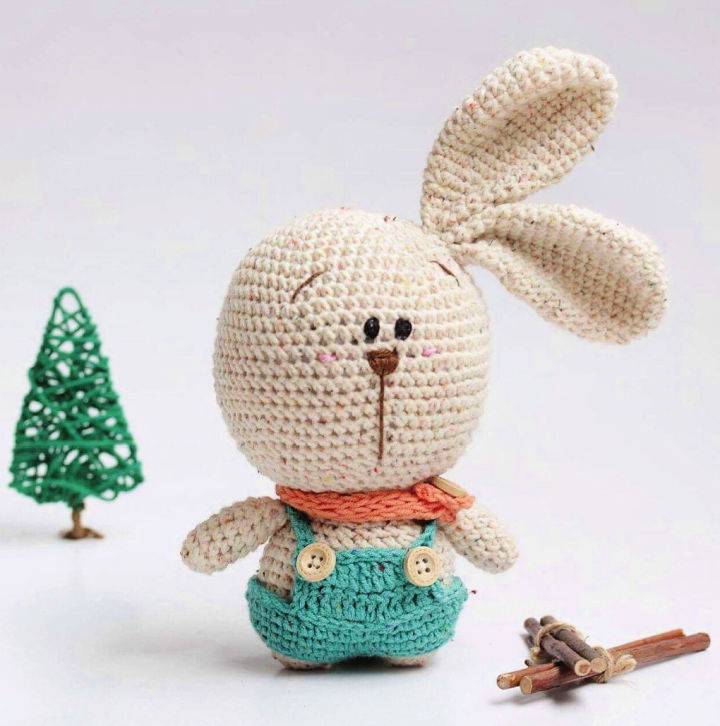
17. Cute Crochet Little Cutie Bunny Pattern
Embark on a charming crafting adventure with the Little Cutie Bunny pattern, designed by the talented Michaela Sumionka. Ideal for those with a grasp of amigurumi, this pattern invites you to create an adorable bunny using a selection of cotton yarns in soothing colors. You’ll need essential crochet skills like magic ring, single and double crochets, as well as techniques for increasing, decreasing, and color changing.
Completing your bunny can be a rewarding project, and as an added bonus, there’s a complimentary dress pattern available to give your creation a sweet finishing touch. Discover the joy of amigurumi and share the love for handcrafted bunnies without commercializing the finished product. Start this delightful project today and download the pattern for free on Ravelry.
18. How Do You Crochet a Bunny Ball Ami
Create an adorable addition to your Easter celebrations with the Bunny Ball Ami, a delightful and free crochet pattern offered by Crowchet Creations. Perfect for spring craft fairs or as a charming gift, this amigurumi bunny is an excellent project for crochet enthusiasts. The easy-to-follow instructions make it suitable for those with basic crochet skills, and the finished product is a small, handheld toy that’s ideal for little ones to grasp and play with.
Not only is it a cute decorative piece, but it also serves as a sensory rattle toy. Make sure to gather your worsted weight yarn, a G/4.25 mm crochet hook, stuffing, and a tapestry needle to start crafting your very own Bunny Ball Ami. For additional support to Crowchet Creations, consider purchasing the low-cost PDF version of the pattern.
19. Crochet Fluffy Bunny – Step by Step Instructions
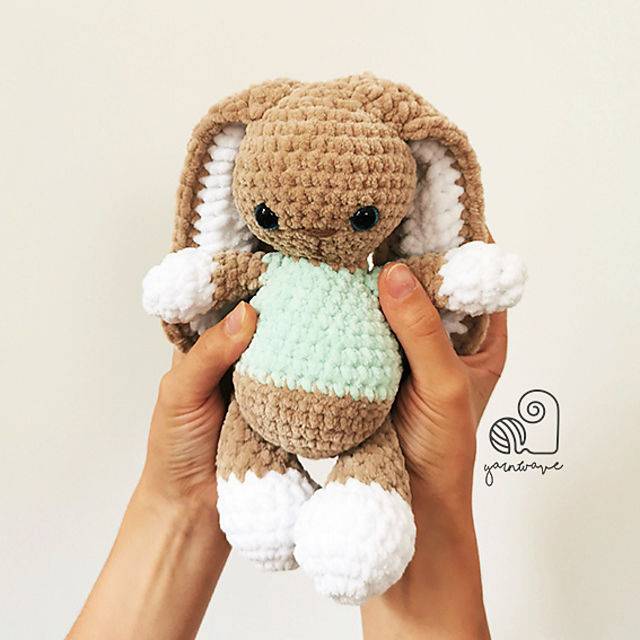
Immerse yourself in the delightful craft crochet with the Fluffy Bunny pattern by Bangaicekauskienė, available on Ravelry. This charming pattern will guide you through creating an adorable softie that is sure to become a cherished creation. With the use of bulky velvet yarn like YarnArt Dolce or Himalaya Dolphin Baby, your bunny will have a wonderfully plush texture that’s perfect for snuggles. The pattern is designed with clarity, providing you with a comprehensive list of materials needed, as well as detailed abbreviations for every stitch required.
The Fluffy Bunny is not only a joy to create but also a perfect gift for loved ones, or a delightful addition to any amigurumi collection. use of safety eyes and a touch of embroidery adds character and life to your bunny. As you follow the step-by-step instructions, complete with a phototutorial, you’ll enhance your crochet skills and end up with a 20 cm tall, fluffy companion. This pattern caters to those familiar with US crochet terminology and is conveniently available for free download on Ravelry, making it accessible for crocheters everywhere. Create your own Fluffy Bunny and hop into a world of crafting joy with Ravelry.
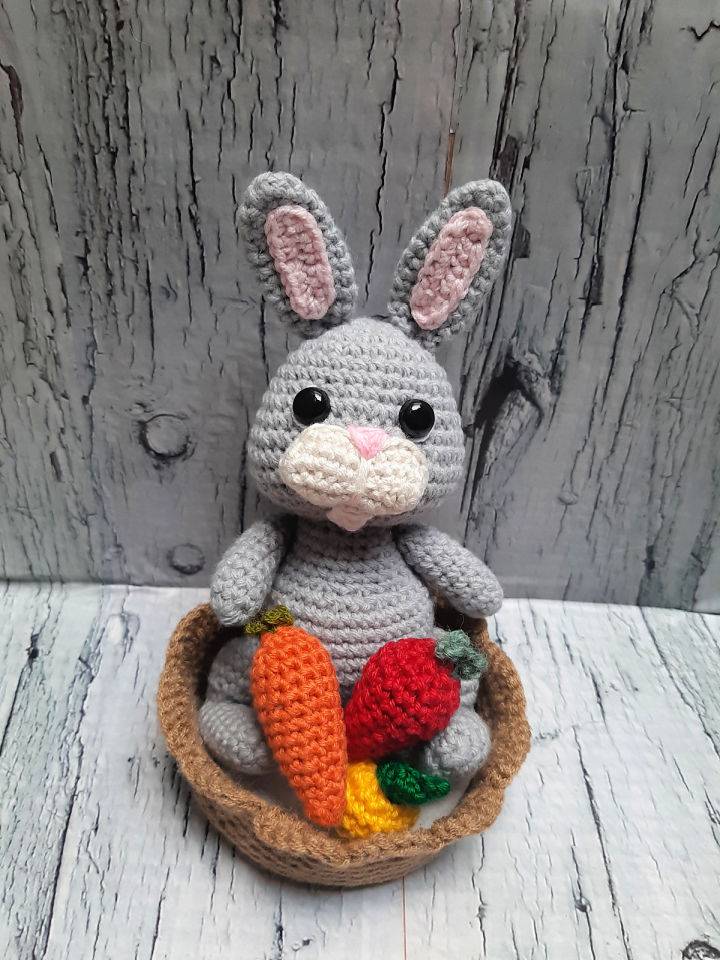
20. Crocheting a Bunny and Carrot – Free Pattern
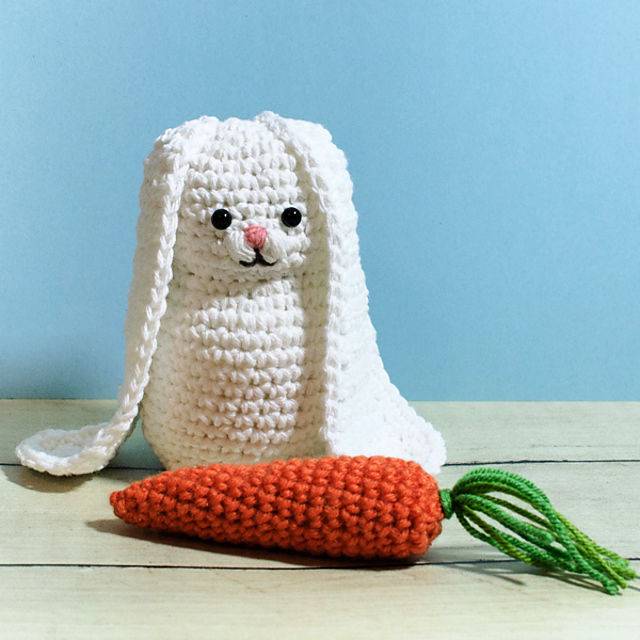
Make your own cuddly crochet bunny companion with this delightful pattern. It features irresistibly long, floppy ears and is lovingly named Flopsy, inspired by Beatrix Potter’s charming characters. Alongside the bunny, you’ll learn to crochet a vibrant carrot, the perfect accessory for your amigurumi friend.
This pattern provides clear instructions, including special stitches and assembly tips, ensuring an enjoyable crafting experience. Ideal for both seasoned crocheters and those new to the art, this project promises to bring a touch of whimsy to your home or as a thoughtful handmade gift. Embrace the joy of crochet with Petals to Picots and add these adorable creations to your crafting repertoire.
21. Free Crochet Bernadette Bunny Pattern
Immerse yourself in the delightful world of amigurumi crafting with the Bernadette Bunny pattern by Crochet 365 Knit Too. Crafters of all levels can create an adorable soft toy with this charming crochet project, sure to bring smiles to everyone’s faces. With its detailed instructions and clear terminology, you can easily bring Bernadette to life using Paintbox Yarns Simply Aran or your preferred worsted weight yarn.
Perfect for g or adding a touch of whimsy to your home, this bunny, standing at approximately 6.5 inches tall without the ears, is a rewarding make for crocheters seeking a mix of comfort and challenge. The downloadable PDF pattern offers an ad-free, printer-friendly crafting experience. Don’t miss out on the joy of making your very own Bernadette Bunny – an amigurumi treasure that’s as fun to create as it is to cuddle.
22. Amigurumi Bunny Crochet Pattern
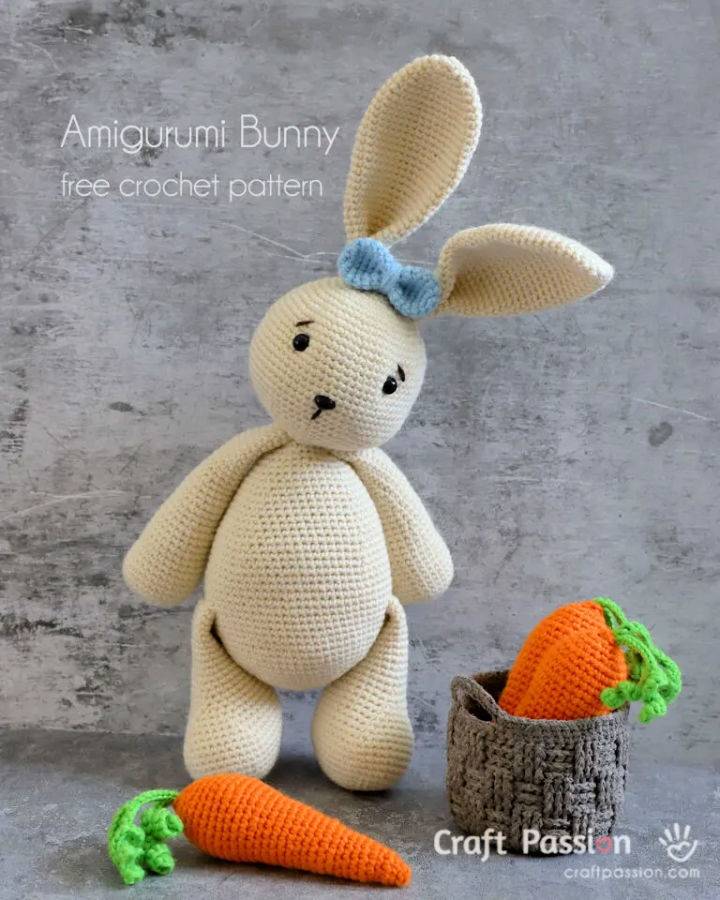
Embark on a delightful crafting journey with the free amigurumi pattern for Bobo, the crochet bunny, offered by Craft Passion. Ideal for both children and adults, this adorable bunny plushie comes to life with your creativity and skill. The pattern caters to intermediate crocheters but is also approachable for determined beginners. With comprehensive instructions and a list of materials and tools, you’re guided through each step of creating your own amigurumi bunny, complete with charming details like upright or floppy ears, a cute bow or flower, and a sweet expression.
Dive into this project, enhance your crochet collection, and maybe even stitch together a companion for your bunny. Your handcrafted Bobo will become a cherished keepsake or a heartwarming gift. Get your crochet hook ready and start this rewarding project today with Craft Passion.
23. Cool Crochet Tiny Bunnies Pattern
Discover the joy of crocheting your very own adorable tiny bunny with the delightful pattern created by Kristi Tullus. This pattern is perfect for crafting a charming keychain or a heartfelt gift that will be cherished by both children and adults. With a finished size of 8 cm from head to toe, and 12 cm including the ears when made with DK weight yarn and a 2.50 mm hook, these bunnies are an excellent project for beginners.
The pattern outlines essential crochet skills such as the magic ring, single crochet stitch, crocheting in a spiral, increasing, decreasing, and the precise art of finishing and joining pieces. While the pattern is accessible for novice crocheters, it does include small details that require a bit of patience and dexterity. Embrace the challenge and enjoy the creative process as you bring these cute creatures to life.
24. Fastest Crochet Peep Bunny Pattern
Get ready to hop into the Easter spirit with this delightful crochet pattern for an adorable Easter peep bunny! Perfect for crocheters of all levels, this guide offers clear instructions on creating your very own festive bunny peep, complete with cute ears and a cuddly shape. The pattern utilizes simple stitches like single crochet and magic ring, making it a great project for both beginners and experienced crafters.
Along with a step-by-step YouTube tutorial, the pattern calls for soft Hobbii Baby Snuggle yarn and other easy-to-find supplies such as safety eyes and polyfill. This pattern is a fun way to bring handmade charm to your Easter decor. Stitch up a basketful in a variety of colors to brighten up your holiday celebration. Remember, safety eyes are not suitable for children under three years of age. Embrace the joy of crochet and make your Easter extra special with this free crochet pattern, available on our site. Rose and Lily Amigurumi
25. Modern Crochet Bunny Pattern
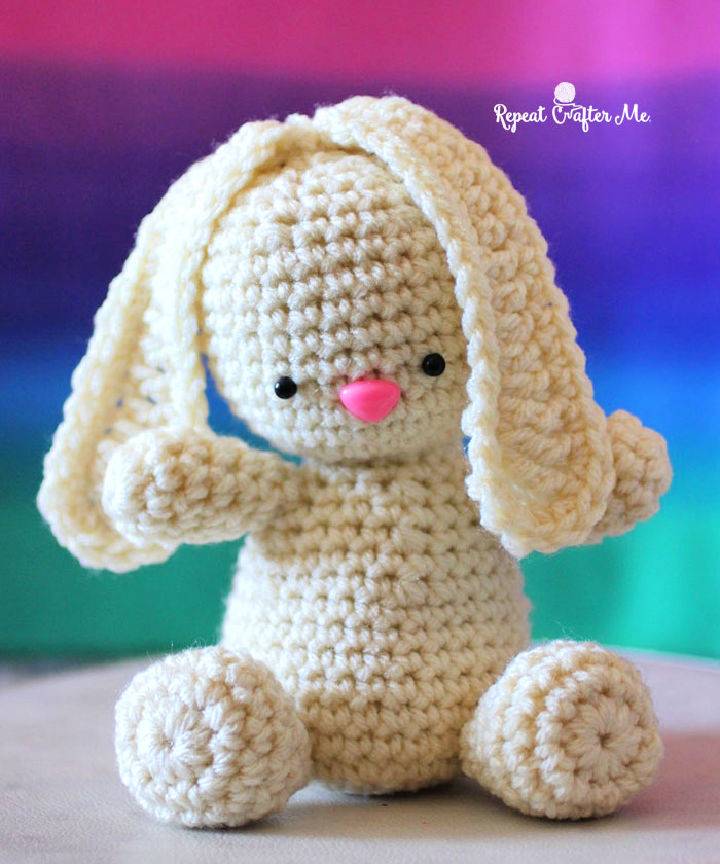
Dive into the charming world of amigurumi with the Easy Crochet Bunny pattern from Repeat Crafter Me. Ideal for beginners and seasoned crocheters alike, this pattern simplifies the creation process by minimizing sewing; only the arms and feet require attachment if you choose to include them.
Crochet an adorable bunny from bottom to top with one continuous piece for the body, head, and ears. You’ll need yarn, a crochet hook, safety eyes and nose, tapestry needle, stuffing, and an optional pom-pom maker. Follow this step-by-step guide for a cute, cuddly companion, perfect as a gift or festive decor. Embrace the joy of crafting with this engaging and rewarding project from Repeat Crafter Me.
Conclusion:
In conclusion, these 25 free crochet bunny patterns are perfect for bringing warmth and delight to your loved ones or adding a touch of whimsy to your home decor. Whether you’re new or experienced at crocheting, these free crochet bunny patterns are designed to guide you through each step.
Share the love and magic of handmade crochet bunnies, and watch as they hop right into the hearts of friends and family. Remember, nothing beats the feeling of making amigurumi special with your own hands, especially when it’s as cute as a crochet bunny!
Related DIY Ideas to Try:
 Crochet Amigurumi: 30 Free Amigurumi Patterns {PDF}
 25 Free Crochet Doll Patterns – Amigurumi Dolls Pattern
 Crochet Jellyfish Pattern (20 Free Amigurumi Patterns)
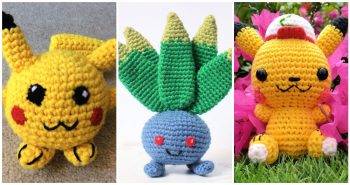 20 Free Crochet Pokemon Patterns (Amigurumi Pattern)
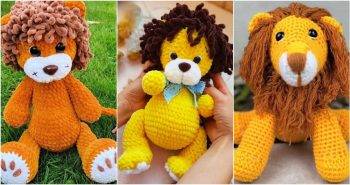 25 Free Crochet Lion Patterns – Amigurumi Pattern
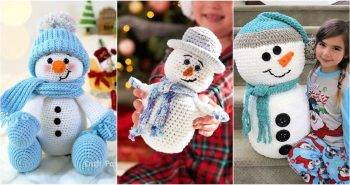 25 Free Crochet Snowman Patterns (Amigurumi Pattern)
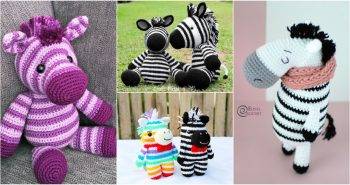 25 Free Crochet Zebra Patterns (Amigurumi Pattern)
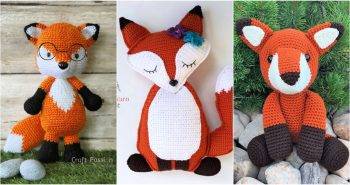 25 Free Crochet Fox Patterns (Fox Amigurumi Pattern)
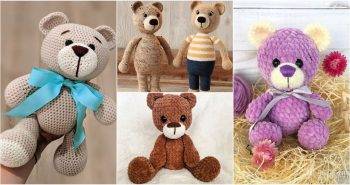 Crochet Teddy Bear Pattern (25 Free Amigurumi Patterns)
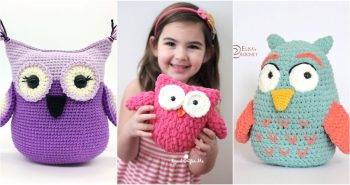 Free Crochet Owl Pattern (25 Amigurumi Owl Patterns)
 Crochet Mickey Mouse Pattern (10 Free Amigurumi Patterns)
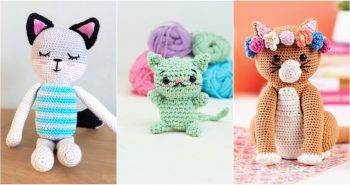 25 Free Crochet Cat Patterns (Amigurumi Cat Pattern)